Plaster walls and ceilings provide character to a home; however, cracks, holes, and spots of water can render any room worn out. These issues are observed in most homes in the U.S., particularly when old and new drywall repairs are side by side.
The bad news: Even with some tools, the correct materials, and a step-by-step strategy, many plaster repair, ceiling repair, and drywall repair tasks can be dealt with by yourself. One does not require the expertise of a professional in repairing nail pops in sheetrock, patching a hole in the ceiling, or addressing minor areas of ceiling water damage.
Why Plaster Repair Matters in Your Home
Repair of plaster also involves looks, but it also serves to safeguard the building behind your walls and ceilings. Cracks develop, paint is peeling, and moisture can creep in when plaster separates itself from the wood lath or drywall underneath.
Many old houses in the U.S. housing market still have original plaster, with some newer drywall and plaster patches interspersed with the older plaster, due to previous renovations.
These surfaces are kept solid and smooth to help you:
- When you are selling your house, keep its value.
- Regard larger repair expenses of ceiling water damage later.
- Maximize your life with paint and primer.
- Stop the falling of dust and chips, particularly off a broken ceiling.
Step‑by‑Step: Complete Fix for Cracks & Damage (Main Guide)
Begin with a brief examination of every one of your walls and ceilings.
Look for:
- Hairline cracks in plaster
- Broad, broken, or lost to pieces.
- Nail pops/screw pops Drywall.
- Brown or yellow marks of water leaks.
- Ceiling areas that are soft, bulge, or even sag.
- When there is a soft feeling in an area or crumbles so easily, then you might need more than a simple plaster re-repair or drywall skimming. In that instance, prepare a little drywall patch repair as opposed to surface filler.
Fix the Source First (Especially for Ceiling Water Damage Repair)
In case you notice that there is any water, then you need to halt, locate the leak, and repair the surface before continuing.
- Beam ceiling, plumbing lines, or an upstairs bathroom above the spot.
- Fix the roof or pipe (or call a professional in case of necessity).
- Allow the space to completely dry, which may take time up to one day using fans and air movement.
Failure to do this step will result in failure of your new ceiling fixer work and recurrence of stains or bubbles of paint.
Tools and Materials You’ll Need
In the majority of plaster and drywall and plaster jobs, you need the following primitives:
- Utility knife, Putty knife
- Sponge or fine -grit sandpaper
- Joint compound or setting -type compound.
- Mix: Plaster mix (to be applied on genuine plaster walls)
- Drywall tape or mesh tape
- Bigger holes should be replaced with drywall.
- Drywall restoration screws: drills and drywall screws.
- Primer and paint were room-coloured.
- With all that is in place, every repair process is easier and time-saving.
How to Repair Cracks in Plaster Walls & Ceilings
The cracks in the plaster are quite prevalent, particularly in the older houses in the U.S., where the foundations have settled.
Follow these steps:
Open the crack
- A utility knife or the scraper edge can be used to enlarge the crack a bit and get off any loose material.
- Blow or rub off the dust to have your repair set.
Dampen and prime if needed
- Spray down the surface with water; plaster takes to a rather moist surface.
- More serious repairs involve the use by some pros of a masonry or bonding primer to ensure a strong hold.
Fill the crack
- Apply the press plaster or joint compound with the help of a putty knife into the crack.
- Flatten it off with the surface and take away excess material.
Add tape for larger cracks
- In case the crack is larger or continues to reappear, cover it with mesh or paper tape.
- Insert the tape in a small piece of compound and flatten the edges.
Skim and sand
- Once it is dry, it can be given one or two light skim layers with the skim being spread slightly further each time to blend smoothly.
Once thoroughly dry, sand, prime, and paint
- When these steps are done properly, the cracks will not recur, and you will have a smooth surface to paint on the wall or ceiling.
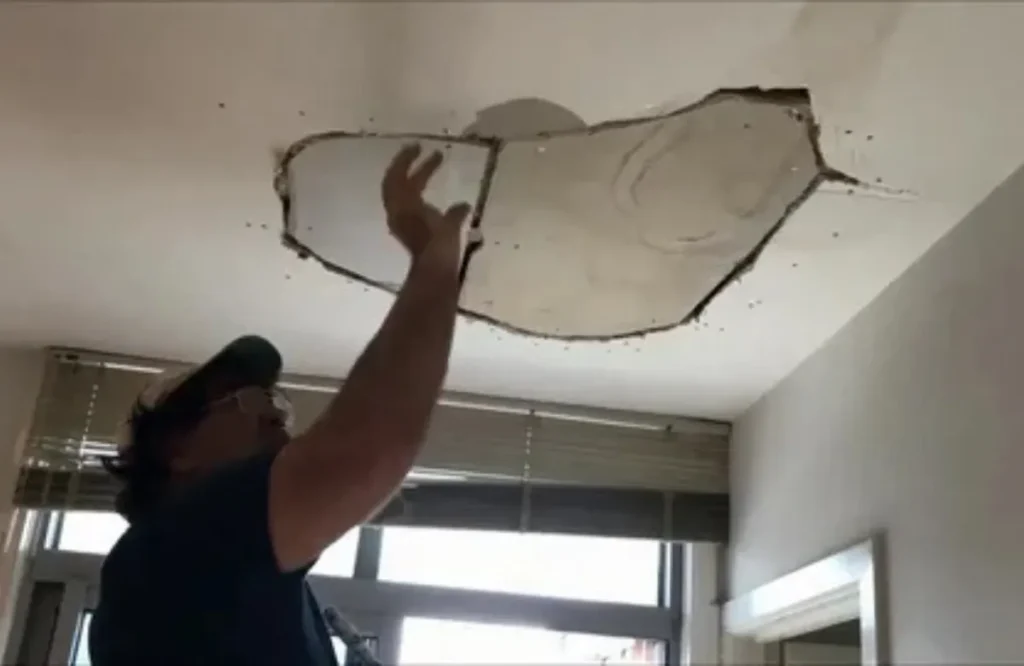
How to Repair a Hole in the Ceiling or Wall
Patching compound should be used on a small hole in the ceiling or wall (such as that at a doorknob). A solid patch is required in bigger holes where lath or drywall is missing.
Clean and shape the hole
- Cut the loose edges to give the hole a clean outline.
- Erase loose pieces of plaster or pieces of drywall paper.
Add backing if needed
- To open larger holes, screw a piece of small wood or backing behind the hole in order to hold the patch.
- With drywall, a new piece can also be screwed up against adjacent studs.
Patch the opening
- Loose a piece of plasterboard or drywall.
- Screw it into the backing or studs.
Tape and mud
- Tape over the joints, and then apply joint compound.
- Finger the edges 6-12 inches off the patch to become part of the rest of the surface.
Sand, prime, and paint
- After it is dry, sand, prime, and then paint out the entire surface to get a smooth finish.
- This is a very easy way to repair both the wall and the ceiling where the damage is too big to be fixed with some spackle.
How to Fix Nail Pops in Sheetrock (Walls and Ceilings)
Nail pops in sheetrock and screw pops occur when the drywall drifts just a little out of the frame made of wood. The screw remains behind, forcing the paint out, leaving it in a small bump.
To fix nail pops and keep them from coming back:
Expose the fastener
- With a scraper, scrape the loose compound over the bump to expose the nail or screw head.
Secure the area
- In case it happens to be a nail, then hammer slightly deeper.
- Install drywall screws approximately 1-2 inches higher and lower than the pop in order to secure the drywall to the stud.
Check for flatness
- Ensure that all screw heads are in place, but below the surface and not out.
- Draw a putty knife over the surface to ensure that it is flat.
Patch and sand
- Cover the area with joint compound, let it dry, and sand it smooth.
- Apply a second thin coat if needed for a perfect finish.
Prime and paint
- Use spot-prime to cover the repair, and paint over so as to have a smooth appearance.
This is a fix nail pops procedure, which can be used on walls and ceilings and is the standard practice of repairing drywall in the United States.
Ceiling Water Damage Repair: Stains, Peeling, and Sagging
When there is water damage on the ceiling, it may appear frightening, but on a small scale, it is usually easy to do DIY once the leak is sealed.
To light stain or peel paint:
- Wipe the surface using a weak detergent and allow it to dry completely.
- Any loose paint or texture should be scraped off.
- Apply a stain-blocking primer on the area and a little further.
- Repaint the ceiling, which is usually done from corner to corner to provide a smooth finish.
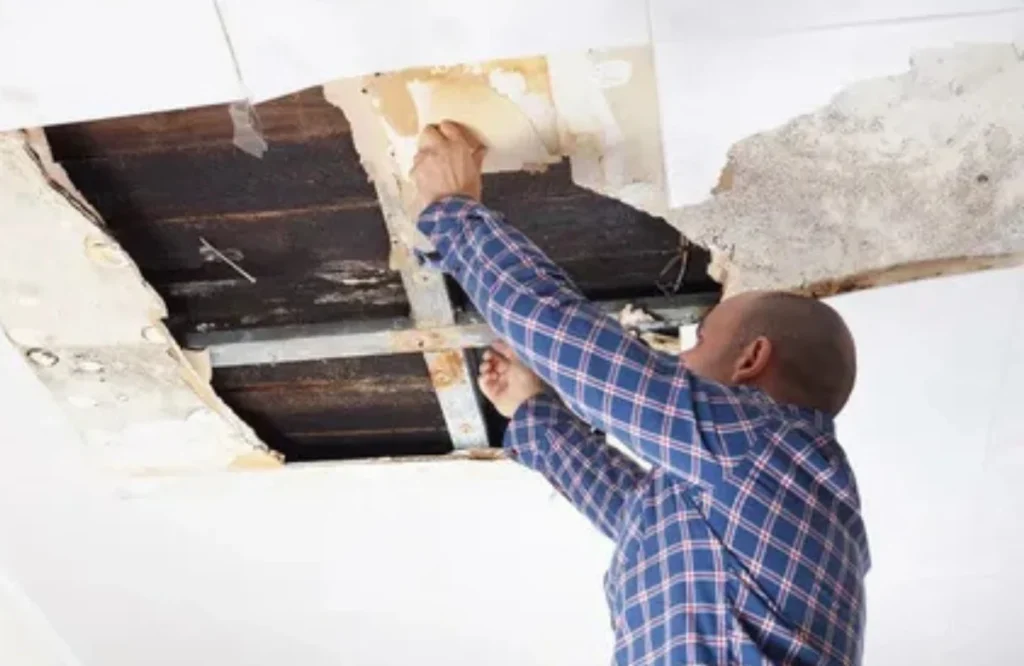
For more serious damage where the drywall or plaster is softening or sagging:
- Chop off the burnt part up to solid material.
- Take off wet insulation, above, where there may be some.
- Purchase another piece of drywall and screw it to the joists.
- Cover with tape, mud, sand, and paint as on any drywall and plaster patch.
You may call a professional or a restoration company, most of the U.S. homeowners do, when that area is large, or there is mold, particularly when the insurance is provided.
Practical Tips and Strategies for Easy, Lasting Repairs
Smart DIY Tips for Homeowners
These straightforward tips can help you achieve a level of performance close to a professional one, even when you are a beginner when it comes to home projects.
- Work in thin layers
Layers of compound crack are thick and take more time to dry, and thin coats are thinner and sandable.
- Sand less by smoothing more
You can use your time to brush off each coat of paint with your knife; it will reduce the amount of sanding and dusting in the future.
- Always prime repairs
Uncoloured plaster and fresh compound absorb the paint; a primer will make it even and coated less often.
- Match materials
True plaster walls should be covered with real plaster products, and drywall should be covered with standard joint compound.
- Use quality tape
A good tape is a technique that keeps cracks away, particularly at joints and corners.
- Safety first
Put on eye protection and a mask during the sanding process and always have a firm ladder for ceiling repair jobs.
These practices make plaster repair and drywall tasks easier and last longer.
Conclusion:
Keeping up with plaster repair, ceiling repair, and drywall restoration is one of the simplest ways to protect your home, improve comfort, and keep your rooms looking fresh. With the right steps, you can handle cracks, a hole in the ceiling, nail pops in sheetrock, and even basic ceiling water damage repair without stress.
To explore more helpful home repair guides and solutions, visit Patch Pros of North Dallas.
FAQs:
How do I know if I have plaster or drywall?
Tap the wall, plaster over lath may seem harder and may sound firmer, whereas drywall may sound hollower, and panel seams are clean. The U.S. homes that are old tend to have more plaster.
Can I paint directly over a repaired crack?
It is preferable to prime first to allow the paint to stick well, and the repair part is not exposed by the last layer. New compound or plaster is also sealed with Primer.
What is the best way to fix a small hole in the ceiling?
In a small hole in the ceiling, remove the edges, apply patching compound, allow to dry, sand smooth, and then prime and paint. Bigger holes require an insertion drywall patch and tape.
How do I stop nail pops in sheetrock from coming back?
Use new screws to fix the drywall on the top and bottom of the pop, then apply joint compound. It is easy to hammer in the nail without additional screws and leave the pop to come back.
Is ceiling water damage repair always a DIY job?
Major peeling and small stains can be easily fixed in DIY once the leak is fixed and the area has dried. Big bulky drops, mould, or huge leakage normally require a professional.
How long should I let plaster or joint compound dry?
Most products need at least 24 hours between coats, though some fast‑setting compounds cure in 20–90 minutes; always follow the label on your chosen product.